
Grab a 7-day MetroCard before you land, and wear comfortable shoes. This keeps you equipped for a week of exploring the city. Plan your days around museums and hubs like Times Square, Grand Central, and Union Square to minimize transit time and maximize time during your visit.
Keep alert to travel updates from official channels; fraud attempts around popular sights happen. Use meeting programs or verified tours, and confirm consulates hours and required documents before you travel. Once you land, set up a quick check with the hotel desk about local scams and how to spot them.
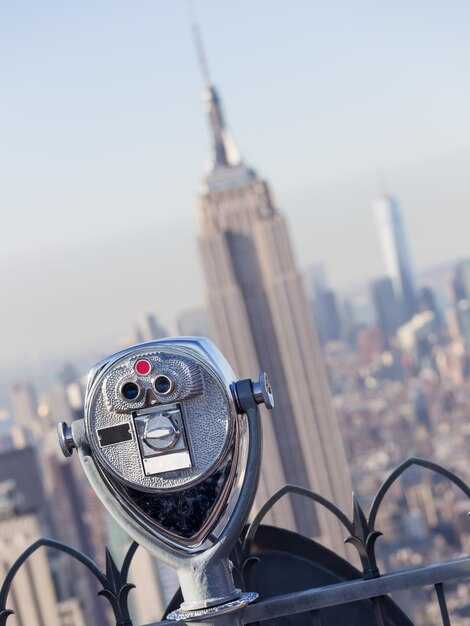
Choose a hotel near subway hubs such as Times Square or Grand Central, with easy access to the subway and major lines. This location makes things simpler and is a perfect balance for a packed week, letting you cover downtown museums, Central Park, and neighborhood strolls with minimal backtracking during your day. If you have limited time, you might start with a Central Park morning, then visit a couple of museums, and finish with a stroll through Chelsea or the East Village for dinner and a night scene.
Budget basics: book flights and the hotel with free cancellation when possible, compare weekend rates, and watch for extra charges in city hotels. The trip requires a card with a chip for many venues, and most places accept contactless payments; carry some cash for street vendors and markets. Look for multi-venue programs or bundled passes related to museums, theater, and tours to save money on a week-long trip.
Be mindful of scams around popular spots; if you’re offered a discount that seems too good to be true, step back and verify with the hotel or consulates' official sites. Avoid cash-only touts and always use reputable rideshares or hotel shuttles. If you spot fraud, report it to hotel staff or local authorities immediately with the details you collected during your stay.
Take the initiative to map a few must-see spots and flexible days. Expect change in crowd patterns and transit schedules, and keep an alert for weather or service changes that affect plans. Meeting locals or guides in the evening can provide a fresh take on neighborhoods related to food and art.
Things to Know Before Traveling to the United States (Especially New York City)
Book your airport pickup in advance and choose a fixed-price ride to avoid delays at the exit. NYC airports such as JFK, LaGuardia, and Newark can be crowded in summer, so pre-arranged transport helps you start smoothly and saves time during the peak season.
Carry a valid passport and be prepared for border checks. An officer reviews documents at entry, and lacking the right paperwork can lead to denied access. Have a clear purpose for your visit and be ready to explain how long you plan to stay.
Canadians typically travel with a passport and can cross by air or land, but always verify current entry requirements before you depart. If you plan to drive, know that driving in the area differs from many places in Texas or the mountain states: streets are narrower in parts of the city, parking is costly, and tolls apply on several bridges and highways. If you rent a car, reserve it in advance and confirm that the vehicle is equipped with GPS and a functioning toll transponder.
Watch out for fraud: purchase tickets only from official sites or trusted vendors, and avoid unsolicited offers that seem too good to be true. Use reputable tour operators, museum passes, and Broadway show tickets to prevent scams and last‑minute regrets.
Prepare for the season by packing layers and reliable footwear. Summer can be hot and humid, so hydrate and carry a light rain jacket for sudden showers. Museums, parks, and stadiums move at a steady pace, and indoor venues offer relief from the heat during peak hours.
New York City sits in a geographical area that blends urban density with generous water access. If you’re coming from the northwest or any long flight, plan for jet lag and give yourself a cushion for initial sightseeing. Public transit is robust and often faster than driving in peak times, especially in central Manhattan.
Expect a multicultural mosaic: you may meet someone native to the city, a born traveler, or someone with roots in Indian, Canadian, or other communities. Several neighborhoods showcase diverse languages, cuisine, and traditions, including vibrant markets, street vendors, and cultural centers that highlight the city’s global character.
Have practical backups: keep a portable charger, download transit apps, note emergency numbers, and carry a small amount of local currency for tips and incidentals. Summer, winter, or any time of year, these preparations help you navigate the airport, subway, and backstreets with confidence.
Preclearance and Arrival Procedures
Verify your SEVIS status and carry your passport, visa, DS-2019 or I-20, and any required documents before boarding. Keep digital copies accessible on your phone and a paper backup in case devices fail. This proactive check speeds up the process at the departure gate and sets you up for smoother preclearance.
At airports with preclearance, find the official Preclearance area for your flight and follow the signage to the CBP checkpoint. Present your passport, visa, related forms, and the documents that prove your stay is legitimate. Be ready to respond to brief questions and to provide biometrics if requested. Keep your SEVIS details handy to verify consistency with your ticket and case notes.
After clearance, you still re-enter the U.S. domestic area. Follow the signs to baggage claim or to the arrivals hall. Regardless of where you come from, follow the signs from the plane to baggage claim and then to the arrivals area. If you need to connect to another flight, check time to your next gate and use the signs for your transfer option. If you’re arriving via an oceanic route, note time zone changes and stay on the monitors for updates.
In the New York area, proceed to baggage claim, then exit to the arrivals area. For ground transport, call your driver or use an official rideshare app; verify the vehicle and driver details before you approach. If you have travel insurance, carry the policy number and emergency contact. If you plan a first day at beaches or hikes, map your route and factor time for transit and security checks.
Weather hazards can affect your arrival. Snowstorms, summer thunderstorms, and other hazards can slow lines and delay baggage. Monitor status on the airline app or airport boards, and plan for extra time in your schedule. If a disruption hits, follow official guidance and stay with your party.
Foreign students should ensure their I-20/DS-2019 details align with their SEVIS record and program start date. Officials may say you should provide additional information; ask for clarification and verify what is needed. If you can't respond in English, request language support or a translator, and know the contact for your school's international office so you can call for guidance.
Keep a simple checklist: verify documents, respond to biometrics requests with calm clarity, and keep devices charged to fuel quick actions at the gate. By planning ahead, you can find the best option for each case and move from the plane to your NYC stay with confidence.
Preclearance: How It Works Before You Enter the United States
Register online for preclearance before you depart; select a port abroad that offers this option and secure your place in line.
At the foreign port or ports abroad, they guide you to the U.S. preclearance area where you present your passport, visa or ESTA, and any required documents. The officers verify eligibility, ask about your trip, and may request medical information if needed.
Involved staff provide clear instructions, and you can find the process straightforward if you prepare. If you were born outside the United States, you still use this procedure when you fly from a preclearance port; if you were born in texas, your intended stay and funds are part of the questions they ask.
Have your papers ready: passport valid for six months, your ticket, and any related documents. If you travel with family, keep additional copies for kids; staying composed helps you respond quickly if asked for details. If you fail to meet the rules, they may refuse entry at the port. You should verify your eligibility before you travel.
After clearance, you board your flight and head to the cabin; you land in the United States without a separate immigration check on arrival. Unexpected delays can still occur due to weather or staffing at the port.
Security comes first: follow instructions, keep receipts, and store valuables securely. noaa forecasts help you plan around storms or heavy air traffic; check noaa alerts for your departure port so you avoid last‑minute changes and extra spending in transit.
The topic of preclearance covers what you need to know before you travel, so verify your eligibility and plan for additional time. If your intended trip includes beaches, you can clear abroad, but plan enough time to manage unexpected prompts or questions. Stay prepared and calm during the process.
If you want more details, ask the airline desk or check official CBP pages; related updates can appear anytime, so review them before travel and respond with any missing information. thanks for staying informed; register again if you need to make changes, and keep a copy of your confirmation. This made the process smoother for everyone involved.
Documents You Need: Passports, Visas, ESTA, and Entry Requirements
Have your passport valid for at least six months beyond your intended stay and apply for ESTA or a visa in advance.
Passports
- Ensure your passport is valid for the duration of your trip and, if possible, six months beyond. Carry at least one blank page for entry stamps or notes; some admissions use electronic records instead.
- Bring copies or a digital scan of the data page, current visa or ESTA confirmation, and your itinerary. Have these accessible but secure.
- If you were born outside the United States, verify you hold the correct visa or ESTA status for your citizenship.
- For medications, keep them in their original packaging from your pharmacy and bring a doctor’s note if required by your plan of travel.
Visas
- If you’re not eligible for ESTA, apply for a visa at a U.S. embassy or consulate. Plan to submit the DS-160 form, schedule an interview, and pay the application fee of $185.
- Prepare documents: passport, DS-160 confirmation, photo, visa fees receipt, travel plans, and evidence of ties to your homeland (employment, schooling, property).
- Work or study visas have specific regulations; your USCIS status might influence processing times and interview requirements. Check your home country’s consulate site for the latest instructions.
- Confirm the visa type aligns with your activities in the United States to avoid trouble at the port of entry.
ESTA and Visa Waiver
- ESTA applies to eligible nationals from Visa Waiver Program countries. Apply online at the official ESTA site; you might receive approval within minutes, but allow up to 72 hours.
- ESTA is valid for 2 years or until your passport expires, whichever comes first, and allows multiple entries with stays up to 90 days per visit.
- Only use ESTA for tourism, business short visits, or transit; working or long-term study requires a visa. If your passport changes, you must reapply for ESTA.
- Bring ESTA confirmation with your travel documents; some carriers verify ESTA status before you board.
Entry Requirements
- At the port of entry, CBP officers verify your documents and conduct a short interview. Have your passport, ESTA or visa, return/onward ticket, and proof of sufficient funds ready.
- You might be asked about your intended length of stay, where you’ll be staying, and your plans for departure. Be prepared with concrete details and an accommodation address if available.
- Declare items that fall under import rules (gifts, souvenirs, medications). Learn what you can and cannot bring; this is part of the layered screening used by homeland security authorities.
- Check government advisories and regulations before you travel; regulations can change and affect what you can bring or how you enter the country.
- Ports and flights are subject to infrastructure timelines and security review; plan for possible delays and schedule your connections accordingly.
- Airlines or your travel company may require proof of ESTA status or visa at check-in, so confirm well in advance.
- If you’re flying from or through the Atlantic region or heading to Alaska, Zion, or other parks, your documentation remains the same; your itinerary doesn’t change the basic entry rules, but be ready for weather-related delays or park-specific guidance.
A practical expression of preparedness: maintain a folder with all documents, keep digital backups, and review entry requirements a week before departure. Therefore, you reduce the chance of last‑minute complications at the ports and inside the homeland security process.
NYC Arrival: Choosing the Right Airport and Processing Time
Fly into JFK or Newark (EWR) for international arrivals to minimize processing time and simplify onward connections; avoid relying on LaGuardia (LGA) for long customs queues whenever possible.
Expect immigration and customs to take about 30–60 minutes on average, plus 15–30 minutes for baggage retrieval and another 15–30 minutes to reach ground transportation. In peak windows or bad weather, total time can stretch to 2 hours or more, so plan accordingly and avoid tight connections.
Before you depart, verify entry requirements on the official website and, if eligible, complete the ESTA authorization online. Have a passport that matches your airline reservation, and keep digital copies of your travel documents. Canadi ans and other visa-exempt travelers often move faster through the process when they have accurate data loaded in their traveler profiles, and always carry your government-issued ID alongside your passport.
On arrival, you’ll find AirTrain connections at JFK and EWR to subway or regional transit hubs, while LGA relies more on bus links to public transit. If you plan to drive, reserve a car in advance and use a clear pickup spot; if you prefer rideshares, know the designated zones at your terminal. After landing, you can reach restaurants, parks, and your hotel with minimal backtracking if you choose the right route.
Think about any appointments or visits abroad, including consulates in New York or other states; if you need a quick hop to Washington, planning ahead saves time. For many travelers, a short stop in New York is smoother with a reserved ride or parking reservation. Always check your times and confirm any restrictions on your website or carrier app, and avoid petty delays by having your documents ready and your plans confirmed.
Tip: if you’re new to the United-states, the table below helps compare options at a glance, and the notes explain practical steps to move easily from plane to curb without unnecessary stops.
| Airport | Best for International Arrivals | Typical Processing Time | Onward Options | Tips |
|---|---|---|---|---|
| JFK | Most international flights; wide flight options | Immigration 30–60 min; total 60–90 min; peak 2 hours+ | AirTrain to subway or taxi/rideshare to city | Use ESTA if eligible; have reservations ready; consider Global Entry for future trips; know pickup zones |
| EWR | Strong alternative for many carriers | Immigration 30–60 min; total 60–90 min | AirTrain Newark to NJ Transit or taxi/rideshare | Check terminal maps in advance; reserve a car or rideshare to speed up transfer |
| LGA | Primarily domestic; limited international | 30–60 min depending on flights | Taxi or rideshare; shuttle connections to transit | Plan extra time if arriving internationally; better for short NYC stays |
Getting Around New York City: Subways, Buses, Taxis, and Walking Tips
You should start with one reliable method: use OMNY with your phone or card, and monitor real-time service via official links before you head out. This keeps your movement smooth and lets you adapt on the fly.
Subways deliver fast transit across boroughs, with about 472 stops across the system. When you land in NYC, you can reach Manhattan via several routes; the landing at JFK or Newark provides easy access to the subway or AirTrain. The differences between rail and bus travel shape daily plans: rail is faster for long hops, while buses reach neighborhoods the rail misses. Driving here is usually slower, parking is costly, and trips can extend with traffic. Stay mindful of crowds and platform edges while you ride.
Buses fill gaps where rails do not run. A typical route serves blocks not covered by trains, and time varies by traffic. Use the same payment method and check the next stops on the map before stepping out; you can often walk a short distance to your final destination. Real-time updates via links help you adjust your plan if a stop is skipped or a reroute occurs.
Taxis and ride-sharing options provide door-to-door service when you want to minimize walking around crowded areas. Meters are standard in yellow cabs, and surge pricing can appear during peak hours. If you want to save, identify your intended stop and let the driver know, so you stay on a direct route. In busy districts, waiters and other workers may staff nearby venues; be polite and follow common etiquette, which helps you move smoothly around traffic hot spots. Walk to a nearby pickup zone rather than flagging a car on a crowded corner.
Walking is practical in most neighborhoods, and it offers a nice, flexible pace. Wear comfortable shoes, stay on lit sidewalks at night, and use crosswalks. Your house base can be a convenient anchor for daily loops: plan a route that starts from your lodging and returns to it around meal times. You should keep valuables secure and remain aware of your surroundings to deter criminals in crowded areas. When you reach a scenic corner or park, take a moment to pause and enjoy the view.
For outdoor lovers, hiking in the NYC area is accessible by quick transit into parks and waterfront trails. Hiking offers a reset after a day of city walking. Pack water, wear sturdy shoes, and monitor weather before you go. This initiative means you can pace yourself and still cover a lot of ground without fatigue. If a route climbs stairs or steep hills, take it slow and enjoy the views; you’ll find a nice balance of urban and green spaces.
Whether you travel solo or with others, this city welcomes individual explorers. If you’re arriving from virginia or other states, plan a simple route by using transit hubs to minimize transfers. The system provides clear signage, service notices, and map kiosks to guide you. You should check a backup plan before heading out, and keep a small note with key stops and transfer points for quick reference.
Next steps: download the official transit apps, review your routes, and note any changes for the day. Thanks for reading and for your attention; with these pointers you can move around NYC confidently and enjoy the city's energy, one block at a time.