Arrive early to catch the first ferries and secure the best view. If you arrived with a plan, you could skip long queues and set your day around liberty-ellis as two linked destinations. A local guide can outline the options and help you stay in the same basic rhythm, moving along stone paths there.
Do choose what to see first: Liberty Island for the statue's sweeping view, Ellis Island for the immigrant history, or both with a single pass. For those seeking flexible options, this approach keeps your day efficient. Families and solo visitors alike can receive practical tips from a guide and tailor the schedule to their destinations. driven by curiosity, your day will unfold smoothly.
On the docks and on the islands, do stay with your group, mind the security lines, and keep the stone pathways clear for others. There, security checks proceed with professionalism; such steps ensure safety for every person. At the dock you will receive a quick orientation and a map to help you plan your routes between the stone terraces and the pier there.
Don'ts: avoid bulky bags, drones, or climbing onto monuments. Keep voices at a respectful level and move along when crowds surge to prevent delays for others.
Practical tips: check the official schedule, use authorized ferries, bring water, wear comfortable shoes, and plan restroom breaks. If you want a calmer visit, try mid-morning or late afternoon windows; the guide can share local tips about ferries options and help you receive the most from your stay.
Visit Plan
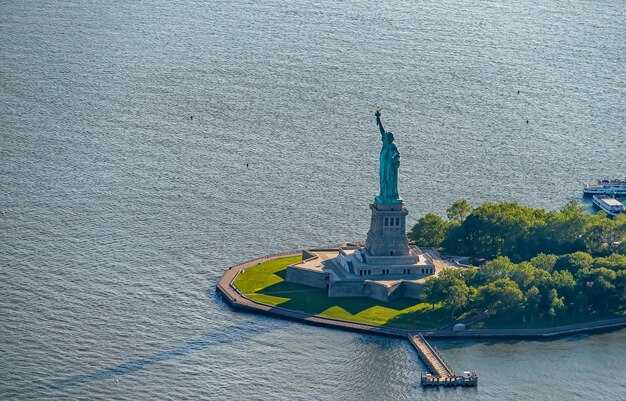
thats a smart move to start with the earliest ferry from Battery Park to Liberty Island, around 8:15 AM, for entering the site before crowds build. Ferries run frequently, and there is value in a citypass if you have one to speed entry. This location-based approach keeps walking easy and maximizes experiences on both islands, so you can enjoy more and wait less.
On Liberty Island, follow the signposted routes to the promenade, the statue base, and the museum. Look for the sign at the dock to stay on the main path, and keep your bag light to ease touring. Pepper your plan with short photo breaks and a quick snack, especially during natural pauses in crowd flow. The signatures of the people who passed through Ellis Island add personal context to your stay. The route, which is clearly signposted, helps you stay on track.
Next, take a ferry to Ellis Island. The crossing is brief, and you can join a guided talk or explore the immigration museum at your own pace. The resource desk can provide directions, hours, and a map you can annotate. Passing through checkpoints goes faster when you have a clear plan. Many visitors use an audio guide to enrich the experience, and you’ll find restrooms and water stations clearly marked.
To keep this plan smooth, check hours and board times on the day, and have a backup option for weather or crowds. If you want a streamlined experience, citypass can provide faster entry across both locations. Use the same plan for a flexible, relaxing visit that covers the main signatures of the site, and join a later ride if you prefer a quieter return.
| Time | Location | Activity | Tips |
|---|---|---|---|
| 08:00–08:30 | Battery Park ferry terminal | Board first ferry | Bring ID, arrive early |
| 08:30–11:00 | Liberty Island | Statue area, promenade, museum | Follow signs, take short breaks |
| 11:15–13:00 | Ellis Island | Immigration museum, audio tour | Join talks if offered; use resource map |
| 13:00–15:30 | Back to Battery Park or nearby | City views, optional return ferry | Check last ferry time; plan route |
Best ferry time management for a 3 PM visit
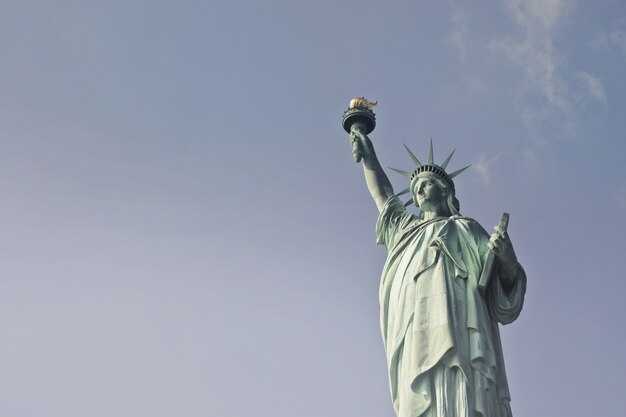
Reserve the 2:00 PM outbound ferry from Battery Park to Liberty Island. This window gives you about 60–75 minutes on Liberty Island to see the statue up close, walk the front terraces, and capture a picture with the skyline in the background. These ticket versions give you options, helping you stay on a tight schedule while enjoying these exhibits and the symbolism of independence that the site emphasizes. Although the day can get crowded, this plan keeps you well inside the 3 PM target and minimizes stress at the checkpoint and screening areas.
- Ticket versions: choose a combined Statue of Liberty and Ellis Island option and select the 2:00 PM outbound with a 3:20–3:40 PM return window to maintain a smooth flow between stops.
- At the dock: arrive 25 minutes early, move to the front of the line, and have your IDs and e-tickets ready to speed through screening.
- On Liberty Island: stay 60–75 minutes for the statue views, exterior building details, and several vantage points for photos; this keeps you ample time to enjoy the site without rushing.
- Ellis Island connection: after Liberty Island, catch the 3:15–3:40 PM ferry to Ellis Island if you want to see a few immigrant exhibits; plan for 15–25 minutes there to avoid delaying your return.
- Return plan: target a late 3:40–4:00 PM return to Manhattan; this buffer helps you navigate waiting lines and bridge traffic congestion near the terminals.
Where to position yourself for the best shot? Stand near the front deck to frame the statue with the harbor and bridge in the distance, then switch to the Liberty Island viewing terraces for a very clear panorama. After you finish, you’ll have a practical amount of time to reflect on the journey these places represent and to share a few memories from your travel–these moments often become the most meaningful picture of the day.
What to bring, wear, and pack for the day
Pack a light day bag with must-have items: a full water bottle, sunscreen, a hat, a light layer, and a compact rain shell. Also bring your phone, tickets, and a small portable charger, plus a card with names and an emergency contact.
The security process at the ferry terminal follows an airport-style flow, so keep bags small and remove metal items before you enter the line. Having your arrival time and a card with names helps if you need to exit briefly for a regroup. If you visited before, know that crowds can swell as the day progresses, especially near sunset.
Wear breathable clothing, sturdy sneakers, and a wind-resistant layer for the ferry breeze; plan for a long walk between Battery Park and the ferry. A brimmed hat protects you from sun on open decks, and sunglasses help when you face glare off the water. Pack a light rain shell or compact umbrella just in case the weather shifts in spring or fall.
For immersion during exploration, bring an audio guide if offered, plus headphones and a spare power bank to keep your device alive through the film and historical exhibits. Snacks and a small bag for kids or helpers keep things smooth amid travelers and the steady pace of crowds. If you want more flexibility, consider a waterproof pouch for your phone near the exit points to protect it during ferry crossings.
finally, note that in recent years this area has expanded its signage and timings. The day can be great and enlightening, with stories told in the film and on-site displays. though the day grows long, youll still have time to photograph the harbor at sunset, and youll depart with a sense of the long immigration story near the castle area around Castle Clinton.
Security, boarding, and accessibility rules you should know
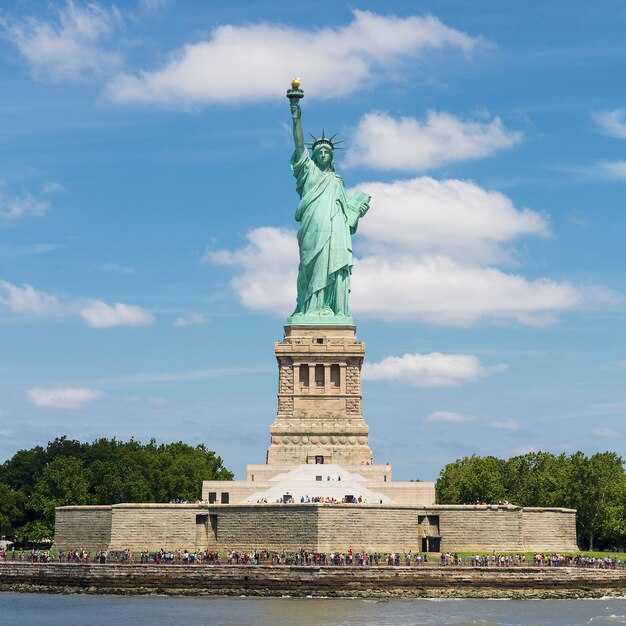
Always allow extra time for security checks and boarding. Your ticket barcode is scanned and cross-checked against a database to ensure you’re in the right boarding group for the next ferry. Millions visit each year to see the famous statue, a symbol of freedom and immigration, and the island’s museums. That thing to remember is to stay with your party and follow loudspeaker updates to avoid delays.
Security rules are strict but clear: pack light and avoid prohibited items such as weapons, drones, glass bottles, and large bags. Bags are screened, and small bags speed the process; you may carry items in your hand through the initial check. Signage and staff speak across languages, including hindi, and officers provide quick explanations if you ask. Do not attempt climbing on railings or barriers, and follow the instructions you are told to keep everyone safe. The process allows quick screening and helps catch anything that could pose a risk.
Boarding steps proceed in a predictable sequence. When you reach the gate, follow the staff directions and present your ticket and any ID if requested. The answer to most questions is posted at the information desk, and staff told us to plan for a multi-stage flow from security to ferry deck. Whether you are with kids or solo, board in the designated groups and keep pace with your line. This covers every step of the security and boarding process.
Accessibility on Liberty Island and Ellis Island is fully supported. The terminals offer elevators, ramps, and accessible restrooms, with hand rails and seating along routes. Wheelchair users can request assistance at the terminal to receive accessible ferry service and on-island transportation. Services include device-friendly maps and audio guides; information is provided in multiple languages to help everyone understand the layout. If you require more help, tell a staff member or call ahead–staff will arrange needed accommodations.
Practical tips: browse the official site and mobile app to catch every detail about schedules, shop hours, and accessibility services. The must-see statue remains the central draw, and the shop offers souvenirs for millions of visitors. When you browse, you can answer most questions without waiting; you’re told where to go and what to do. Whether you’re sightseeing with family or traveling solo, plan a route that minimizes climbing and avoids crowds. one thing to remember: always check the schedule on the official site. Always carry your tickets, needed documents, and a charged phone.
Photography tips: where to shoot and where to avoid
Shoot at first light from the ferry deck or Battery Park; thats the best moment to grab crisp images of the statue with the harbor included in the frame.
Choose places that are designed for good vantage points: on Liberty Island along the railing near the statue for close-up details, or on Ellis Island grounds for architectural views with the city behind you. these spots allow close framing. From the departing ferry, capture long perspectives that show the water and skyline. There are many angles, so arrive early to secure your spot; daily departures help you plan, and there is a rotation of riders and travelers along the docks. each shot reveals a different detail, and you’ll share the space with a million visitors, so choose your moment and position accordingly. For iconic silhouettes, test the water's edge as the boat pulls away after departure, framing the statue with the harbor and crowds in motion.
Avoid interiors where photography is restricted, and avoid blocking access paths. On crowded decks, avoid longer exposures that require steadier support; instead move with the flow of the crowd to keep safety lines clear. Carry only the items you need and keep bags compact; leave beverages in the bags or at your table when feasible to prevent spills on lenses. After you shoot, step back and let others have their turn, always mindful of posted signs and any contract rules the park enforces to protect artifacts and visitors.
there are also places where photography is not allowed; learn to respect those limits to keep access open for everyone.
for flexibility, pair a zoom lens with a versatile prime; use a polarizer to tame glare on water and glass, and shoot in RAW to preserve color data that you can adjust later. early hours yield richer shadows and texture on the statue, so set a low ISO and moderate shutter to balance detail. some guides speak hindi; if you travel with a group, plan a route that avoids bottlenecks and spreads the crowd so you can shoot calmer frames. this approach is designed to help you learn the city from different angles and ensure that you capture the whole scene in your daily sessions.
Facilities, food, and wheelchair-accessible routes on the islands
Reserve pedestal access and ferry slots early; daily availability is limited, especially on weekends, affecting seeing more of the exhibits with less waiting.
On both islands, wheelchair-accessible routes follow paved paths with ramps at entry points; elevators connect dock level to main concourses; staff provide support if you need help navigating.
Food and snacks: snack kiosks and a cafe offer coffee, bottled water, and light meals; hours vary by season, but most outlets operate daily; plan a quick bite between rooms and exhibits.
Exhibits and accessibility: Historical exhibits provide insights into immigration and America’s story; many displays are at accessible heights, with lowered counters for closer viewing; multimedia stations include captions and audio descriptions.
Practical tips: Reserve early, check official schedules, and share your plan with companions; if you get tired, sit in shaded waiting areas; restrooms are clearly marked and accessible; free water is available at several stations.
Navigation and design: The stone landmark structures blend heritage with modern facilities; a nod to design motifs echoes the eiffel inspiration in some decorative elements.
Ledgers and logistics: Keep an eye on daily ledgers for entry totals; clear signage and contract policies help you move efficiently and avoid crowding.
Seeing the landmark up close gives you a connection to america, and leaving with richer insights is within reach when you reserve, use the right routes, and pace yourself.