Grab a sunrise session on the Brooklyn Bridge to capture a mesmerizing, stirring contrast between century-old brick and gleaming glass. these moments, times when the city wakes, reward a perfect memory: shoot from the pedestrian span, then turn toward the skyline for dramatic silhouettes, and enjoy the glow on the river.
Historic corners near Times Square reveal how the city stand against a modern chrome canopy. In old photos, tenement staircases and cobblestones murmur about a different era; today, you find broadway marquees, transit trains, and icon ceilings of glass. If you want a crisp past-present pair, shoot early morning along broadway when the streets are quiet in these times, and, if you’re there in December, catch nutcracker performances at Lincoln Center reflected in storefront glass.
Explore hidden blocks and these neighborhoods where street scenes reveal people, foods, and city rhythm. In the East Village and Chelsea you can grab dumplings, bagels, and seasonal foods from sidewalk vendors; grab a quick bite and keep shooting. The kyclades idea pops up when you compare rows of old storefronts with new galleries–an icon that repeats across blocks and gives you a visual list to collect.
Carry a compact camera or a good phone and a light tripod. being ready lets you catch the moments at dawn or after sunset. If you shoot at dawn, try exposure around 1/100–1/125 sec, f/8, ISO 100 to keep skyline detail; for night scenes, raise ISO to 400–800 and use a tripod for clean lines. A 24–35mm lens fits most blocks, helping you frame multiple façades without moving too often. consider shooting RAW to preserve color control and avoid heavy compression on the river blues and street lamps.
As you compile your album, these notes help you enjoy the mood of the city, from daytime silhouettes to night-time neon. Collect photos that turn a single frame into a story, and share them with everyone who loves icon moments of New York.
Photos of New York: Past and Present – NYC Travel Tips; 1890 Ice skaters in Central Park
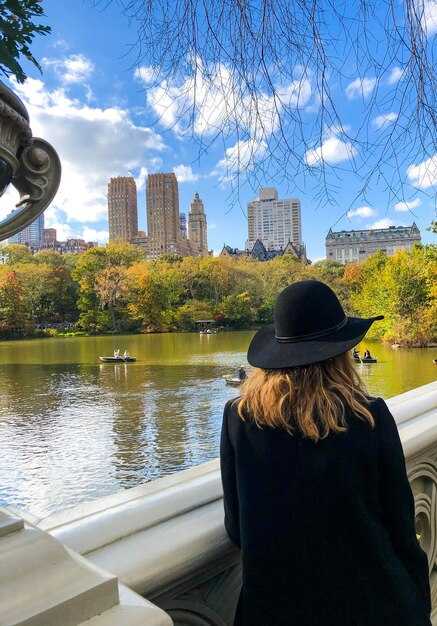
Begin your november weekend with a stroll through Central Park, focusing on the 1890 Ice skaters in Central Park. Park-side paths lead to the Boathouse, where winter light and water create a stirring contrast with today’s skyline; watch the reflections and note the pink tones that appear at dusk.
These archival scenes pair well with independent galleries nearby. The hulton archive offers prints you can grab at shop stalls; also pick a postcard for a museum-quality memento, and observe how dress and activity reflect an era of independence on the ice. The outfits hint at polo-era style, adding a playful angle for photography.
Plan a yonkers-side detour to compare a riverfront mood with the park’s charm. The boathouse remains a haven for visitors, while nearby offices and halls host events that echo the 1890 mood–these spaces continue to welcome modern admirers, lucky viewers who love a quiet contrast.
To build a practical itinerary, sign up for a guided walk that links Central Park spots with galleries. If you prefer a self-guided route, grab a map, and pick a path that ends at a hall or gallery for a concise sign-to-sign experience. Also consider november weekends when crowds thin and light favors photographs.
In the field, prepared travelers compare vintage frames with current street photography. The idea is simple: use the 1890 Ice skaters in Central Park as a compass for modern itineraries, and let the pink light, water, and trees guide your shots while you observe visitors. The museum mood, shops, and galleries fuse past and present into a single plan.
These tips help you continue your exploration on weekends, with a clear focus on how past images like the 1890 Ice skaters in Central Park inform today’s urban photography. Stay flexible, watch for gallery hours, and treat each stop as a haven for fresh inspiration.
Practical photography guide for exploring New York’s historic and current visuals
Begin at dawn on the Bowery and shoot toward the Beekman lobby’s marble hall to contrast gritty industrial textures with refined interiors. Capture iconic storefront lines that lead the eye toward downtown silhouettes as the city wakes.
Pack a compact kit: a 24-70 zoom for street work, a wide 16-35 for architecture, and a fast prime like 50mm for candid portraits; bring a small tripod for interiors and low-light scenes, plus extra batteries and memory cards. A weather-sealed bag helps you move between indoor galleries and outdoor façades without worry.
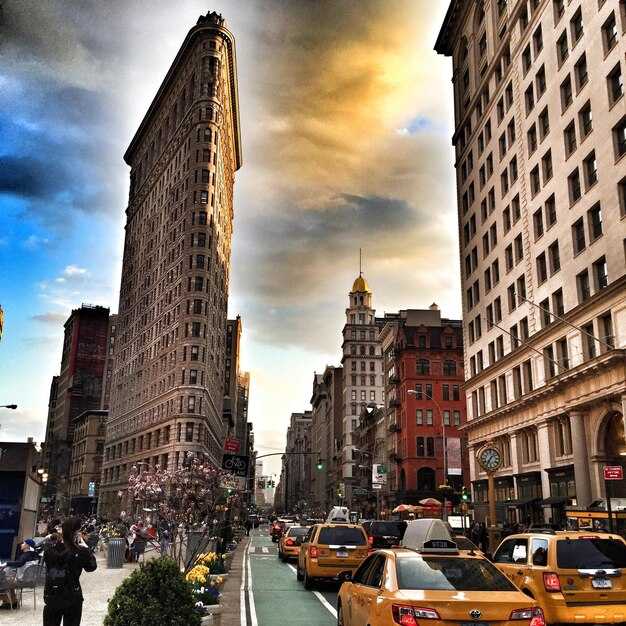
Plan your timings by district: early morning light on the Bowery, Nolita, and the Flatiron District reveals brick and marble textures; a yonkers riverfront sunset offers dramatic silhouettes after a quick Metro-North ride; mid-day shots favor glassy towers along Times Square; evenings bring neon in Chelsea galleries and industrial docks by the river. Use transport options such as subway lines and Grand Central Station to connect routes efficiently; pack sandwiches or foods from street vendors to sustain long shoots and avoid rushed frames.
In composition, emphasize leading lines, symmetrical facades, and the rhythm of windows and columns. Capture a sequence of moments where a pedestrian, a bus, and a reflection align; bracket exposures for dynamic range, then choose the version that preserves the mood. When you shoot interiors like the beekman lobby or a gallery entry, position yourself to include signage and the texture of marble or terrazzo; capture a frame that communicates the worlds within the shot and keep the foreground crisp while letting the background recede.
Route ideas and practical workflow: day one, begin on the Bowery, sweep through Nolita to SoHo, then to the Flatiron District for diagonal lines, continue to Times Square for neon, and finish with Chelsea galleries for curated interiors. Day two includes Grand Central Station exterior, river views from yonkers, and sunset along the river; if time is tight, substitute a Beekman lobby session for interior texture study. This approach works for sharing with galleries and for documenting a city that sounds like a legend to newcomers; it also helps maintain a steady pace so you capture multiple angles without rushing.
Post-process with care: keep white balance aligned with the scene and avoid oversaturation in neon signs; lift shadows subtly to preserve texture on marble; maintain color consistency across a series if you publish on a page or in a gallery. For captions, reference sources on photosgetty to provide historical context and enhance the narrative around a given shot’s subject. Use concise notes to explain what you captured and why it matters, which adds depth for both tourists and locals examining the images.
| Scene | Lens | Settings (approx.) | Tripod | Tips |
|---|---|---|---|---|
| Street morning | 24-70 | f/5.6, 1/125s, ISO 200 | No | Frame through moving subjects; align architectural lines with curb. |
| Architecture / Bowery | 16-35 | f/8, 1/125s, ISO 100 | No | Keep verticals straight; shoot from a low or eye level to emphasize rhythm. |
| Interior lobby | 24-70 | f/2.8, 1/60s, ISO 400 | Optional | Stabilize with a monopod if possible; capture texture in marble and lighting. |
| Night neon | 24-70 | f/4, 1/8s, ISO 1600 | Yes | Use tripod and remote release; bracket for color balance. |
| Riverfront (yonkers) | 70-200 | f/8, 1/125s, ISO 100 | No | Frame the waterline against skyline silhouettes; experiment with compression. |
Use this approach to build a cohesive set that narrates New York’s layered visuals–from industrial textures to marble elegance, from bustling streets to quiet river moments. The blend of historic and current visuals will resonate with readers seeking a practical page of travel photos and gallery-ready prints.
Locate 1890 Central Park ice skating images in public archives and libraries
This is the starting point: search NYPL Digital Collections for "Central Park ice skating" and narrow the date to 1890–1892 to capture early glass-plate and albumen prints, then expand to other archives.
-
Primary repositories to check
- New York Public Library Digital Collections (nypl.org/digital) – use "Central Park" and "ice skating" with a date range around 1890.
- Library of Congress Prints & Photographs Division – search terms like "Central Park skating" and include the year 1890 to surface labeled images including captions.
- Digital Public Library of America (DPLA) – combine collections from multiple institutions and look for items credited to beals or hughess.
- Internet Archive and public-domain photo archives – scan for 1890s Central Park views with skating subjects.
- Local catalogues such as the Museum of the City of New York (MCNY) and New-York Historical Society – check image records in walking distance to the Fifth, Fifth Avenue corridor and downtown districts.
-
Search techniques and terms
- Use combinations like "Central Park" + "ice skating" + 1890, and try variants such as "Central Park skating 1890" or "ice rink Central Park 1890."
- Include photographer credits in searches: beals, hughess, anthony, and other credited names to refine results.
- Explore captions that mention landmarks, like bridges, mercados, or Italian haven areas in the park’s surrounding design, which helps locate context.
-
Photographers and metadata notes
- Look for items credited to beals or hughess; these names often appear in early park photography records. If a record lacks full metadata, cross-check with other institutions to confirm date and location.
- Pay attention to captions that express street context or district references (downtown areas, nearby Fifth Avenue designs, or the Italian-inspired surroundings) to position the image in the right space above ground level.
- Some records include notes by archivists such as Gwen or Anthony; these notes provide clues about image series and provenance. Consider these as valuable leads.
-
How to verify and amend metadata
- Compare multiple copies of the same scene to confirm the date; look for amendment notes in the catalog record that update location or year.
- Check for different formats (camera, glass plate, albumen print) to understand how the scene was captured and how it traveled to public archives.
- Record consistent details across sources to build a reliable mini-collection, then note any discrepancies for future research.
-
Practical steps for gathering and organizing
- Download thumbnails first to assess image quality; then request higher-resolution scans where rights allow.
- Tag images with keywords: Central Park, ice skating, 1890, photo-by-beals, urban design, walking paths, Fifth Avenue proximity, downtown surroundings, and district context.
- Create a focused folder: 1890_Central_Park_Ice_Skating; include a short note on each image’s source, year, photographer, and any caption details.
-
Final curation tips
- Assemble a small gallery of 8–12 standout images that show motion, crowd size, and park architecture; these become a concise “incredible” peek into 1890 skating life.
- Annotate each image with location hints (near Fifth Avenue, around the park’s skating ponds, or near a notable district landmark) to help future readers navigate the archive.
- Include context about the era’s market and leisure culture, noting how skating scenes reflected social life in downtown Manhattan and the surrounding districts.
-
Where this search can lead you next
- Explore related 1890s street photography that shows the overall image design and urban texture around Central Park.
- Cross-reference with contemporaneous Italian-influenced park architecture or nearby shops and markets to enrich the narrative of this haven within the city.
- Turn findings into a compact exhibit that highlights the evolution of Central Park’s winter recreation and the public archives that preserve these memories.
Finally, assemble a concise set of references and captions that express the best images, including their photographer credits (Beals, Hughess, Anthony) and archival links, so readers can explore around their own schedules and walk through the district’s historic ice-skating scenes.
Identify current photo hot spots that mirror iconic 1890 scenes
Go to Greenwich Village at golden hour for a bucket-list frame that mirrors 1890s life around the Washington Square Arch. The historic stone, cast-iron balconies, and quiet angles deliver a stirring, timeless glow that the moderator would say anchors any urban archive.
- Washington Square Arch, Greenwich Village – position yourself on the south lawn so the arch sits above the arc of surrounding paths. Shoot during the blue hour to capture killing light that softens brick texture and brings out the world of late-19th century streets. Use a 24–70mm lens to keep the slice of people and architecture in one frame, and wait for the light to dip just enough to reveal detail in the stone.
- South Street Seaport cobblestones and old waterfronts – walk Water Street toward the East River to frame rowboat silhouettes against brick warehouses. Try a wide-angle setup from street level, then switch to 50–105mm for portraits with the skyline as a backdrop. The scene offers a mesmerizing blend of historic lanes and modern ferries; shoot during dockside activity for natural movement that mirrors 1890s life in motion.
- Brooklyn Bridge approaches on the Manhattan side – capture the arching cables and sandstone towers with pedestrians and a distant trolley-like silhouette as if stepping out of history. Best results arrive after sunset or just before dawn when the light above the river is soft yet glowing. This spots a world of texture that plays with reflections in the water and a glow that feels both grand and intimate, stirring a sense of glory.
- Castle Clinton and Battery Park waterfronts – frame the fort’s curves against ships’ masts and the harbor. Shoot from Battery Park’s esplanade during the “golden hour” to emphasize weathered wood and iron railings. A small prop like a vintage bucket or a subtle lens flare can emphasize the depth of the scene and keep the tone historic that comes across as prepared and deliberate.
- Greenwich Village lanes near the Washington Square area – seek narrow, tree-lined streets with storefronts that recall late-1800s commerce. The lighting above the sidewalks creates a warm, stir-cring ambience; invite a local co-creator, such as anthony or a friend named davóne, to walk the block for candid, documentary vibes. This is a spot where the world seems to slow, and every step feels like a new frame waiting to be captured.
- Rudys coffee shop and Tarbox gear stops along the route – pause for a quick reset at rudys, then pick up a compact lighting kit from tarbox to experiment with edge light and soft key tones. Carry a small bucket or light modifier in your bag to stay prepared for changing shade, and aim for a final shot that stitches the historic mood with modern comfort. These stops can help you craft a cohesive, hyper-specific set of images that feel both stirring and practical.
A compact day plan: from Grand Central to Central Park with photo stops
Start at Grand Central Terminal's main concourse at 9:00 a.m., camera ready for the illuminated ceiling and the grand hall. Trains rumble overhead as you capture three decisive frames: the celestial clock, the arches, and the general crowd for your collections. If you’re out-of-town, this hub offers instant orientation and a sense of the city’s citizenship in the street life. Grab coffee from a corner cafe and notice waiters weaving through the rush, a small theater of daily life.
From there, walk to Bryant Park for a quick photo stop. In winter the skaters carve the ice; in other seasons the park's edges glow with activity and passersby pause for frame-worthy shots. Neon fish motifs light up storefronts along the route to Fifth Avenue, while illuminated signage and the rhythm of crowds create natural portraits. Whether you shoot with a phone or a camera, you’ll find the frame ready.
Three easy photo stops follow toward Midtown: the stately facade near St. Patrick's Cathedral, a modern storefront, and a semi-secret entrance to the Guggenheim if you’re up for a brief detour. The Guggenheim adds a contrast of spiral ramps and light that’s a treat for photosgetty-style captions and dream-worthy frames. Short visits to nearby galleries can add texture to your shots.
Three architectural traces await: one of the oldest facades on Fifth Avenue, fire escapes clinging to brick, and a hall-like atrium in a storefront that nods to italy in its signage. You decide on your choices for framing: clean street lines, reflections in glass, or a close-up of a mural that feels like a mini museum within a block.
Then head uptown toward Central Park, with a dumplings break at a quick eatery along the route if you crave a savory bite. In the afternoon light, capture portraits of locals, skaters, and waiters in a smooth rhythm. A playful caption mentioning bettmangetty can appear in your notes as a nod to quirky city references, while the day’s shots fill your collections again.
Finish at Central Park with the golden hour in the trees and the lake reflections. Three sure-fire spots: Bow Bridge, Bethesda Terrace, and the Mall with its long avenues of trees. Keep a few frames for a future album and look back at the city’s illuminated skyline from the park edge.
Smart photography etiquette in busy NYC areas and permit basics
Ask for consent before close portraits in crowded NYC spaces; a quick, friendly check typically yields a positive response and prevents conflicts.
In public spaces, casual street photography is usually allowed without a permit for non‑commercial use. If you plan a commercial shoot or want to license images for editorial or advertisement, consult the Mayor's Office of Media and Entertainment or Film NYC for the permit process. A still photography permit requires you to specify locations, times, equipment, and crew size; the review can take several business days. For drone work or activities that may block sidewalks or transit, obtain the necessary FAA clearances and city approvals. When you shoot inside private venues, museums, shops, or cultural centers, obtain permission from the property owner first.
Private‑property rules matter most in busy corridors. If you’re capturing customers at a sidewalk table or a storefront, ask the staff or manager before shooting people at a table or counters. If permission is denied, pivot to exterior shots or wider street scenes. Use a relatively compact setup or a longer lens to minimize intrusion, and avoid formations that jam pedestrian flow or create bottlenecks near entrances.
Around crowded landmarks, be mindful of cultural sensitivities and crowds. Tell people your intent briefly, address any concerns calmly, and back off when someone objects. Respect jewish spaces and events; during religious observances or ceremonies, prioritize discretion and ask for guidance from event organizers when possible. If a performer or actor happens to be in the shot, keep a respectful distance and avoid posting until you have consent. In places where skaters or joggers share sidewalks, yield to the group and avoid sudden moves that could disrupt their pace.
Gear choice should support quick, authentic captures. Modern cameras and smartphones perform well in low light, but in busy zones you’ll benefit from a quiet shutter and steady grip. A fish-eye lens is rarely suitable for candid street scenes; opt for a standard or telephoto lens to compress between architectural features and people without distortion. Frame between storefronts, banners, and floral displays to emphasize design and architectural details; the floral motifs and the glass around a tiffany sign offer compelling context while keeping the subject front and center.
When you need archival context for licensing, consider getty and bettmangetty as reference sources, and check licensing terms before publishing images that include recognizable people or private property. If you plan to license an image commercially, secure model releases for identifiable individuals and property releases for private locations. Always credit sources for historical or archival elements and understand that rights may differ for editorial versus commercial uses.
To tell a story without sensationalism, capture moments that feel authentic and spontaneous. Look for clear lines and strong contrasts between architectural features and everyday life; a quiet moment on a busy street often becomes the legend of a neighborhood. Capture scenes where people interact naturally–an actress stepping from a subway stair, a designer storefront’s façade, or a group clustered around a street vendor near a cafe. For urban vignettes, shoot outside during late afternoon light, when shadows lengthen and colors deepen; you’ll often find the best light on ivy walls, lanterns, and beercade storefronts along a busy avenue.
Practical etiquette for practice shoots: approach strangers with a brief hello, introduce your project, and offer to show a preview if they’re curious. If you’re with a group, designate one spokesperson to handle permissions; this reduces miscommunication and speeds the process. If you’re shooting in a public plaza, avoid blocking paths or forcing others to move for your shot; invite cooperation from nearby vendors and fellow pedestrians. When photographing around famous corners or near the Liberty’s symbol or iconic signage, prioritize respectful distance and avoid lingering over any single person who isn’t posing or consenting.
In summary, smart photography in busy NYC areas blends courtesy with clear permit awareness. Keep it modern, use discreet gear, tell people your purpose, and respect private spaces and cultural sensitivities. Use between moments to capture authentic action–whether it’s skaters weaving past architectural details, a florist’s floral display, or a passerby pausing at a storefront–without compromising the flow of the city. If you need a reference point for historical mood or licensing, explore getty and bettmangetty archives, but always secure appropriate permissions for new work. Through thoughtful timing, respectful communication, and careful composition, you can document the city’s energy while supporting the people and spaces that keep it alive–one captured moment at a time.
Composition tricks for blending old and new city silhouettes in a single frame
Begin with a deliberate two-layer frame: a foreground architectural silhouette from the earliest era rests on a pedestal, while a modern west side skyline rises behind water. This setup immediately communicates contrast between memory and change, inviting the viewer to compare details rather than the whole city in one glance. Use this approach to quickly establish a clear side-by-side narrative that feels intentional rather than accidental.
Position the old silhouette on the left, the new on the right, and frame three planes: foreground, middle, background to guide the eye. Use a narrow depth of field to keep the foreground crisp while the background softens, so the moments remain distinct yet tied by line and light. This balance helps the frame avoid a sense of death and feels alive to viewers who regarded architecture as living memory.
Set three reference points along a diagonal over water: ellis island frontages, a glass-clad tower in nolita, and a brick pedestal of a historic office building. Align their edges with a common horizon so silhouettes interlock rather than collide, letting reflections blur the boundary. This approach is regarded as help for readers to notice the shift in time within a single frame.
Color and texture matter: shoot in the blue hour to keep older forms dark and dramatic, while a hint of warm light from office windows adds life. If color is sparse, introduce an accent hue–perhaps the red of a nolita sign or the blue of a distant water line–to unify the frame without overwhelming it. Refer to archivegetty for earliest architectural details and note how theodore and emma captured similar angles to guide your timing. Visiting robertas in nolita, watch chaos and the way women move among places; the rhythm they create helps your frame feel alive.
Plan three quick setups at visiting locations and compare: a wide frame that emphasizes the skyline, a mid-frame for strong side-by-side silhouettes, and a tight crop focusing on a single architectural feature against the new mass. Shoot RAW, bracket exposure by 1 stop, and use a tripod to preserve alignment between layers; after capture, blend by masking rather than heavy processing. Three checks will help you refine the balance and ensure the two eras read as one narrative.
Use robertas as a reminder of how place and memory intersect; place a reference object on the west side to anchor the scene and invite the viewer to read from ellis to nolita among places you visit. This approach helps viewers see a city as a timeline where the old side remains present while the new grows, and the knowledge gained from these comparisons adds depth to every frame. Either way, the rhythm remains readable.